Monday, September 14, 2020

Dungeon wall part 2


This is part two of the dungeon wall, things to add to the foam wall. 

For this wall I used skulls from the dollar store, fake greenery, creepy hands, lanterns and cheesecloth, but make it yours! 

I used 36 dollar store skulls ( shout to my friend Jen @classycosmetics for this idea!) 
In order for them to lay flat I had to cut off the backs of their skulls. I did this by having a cutting mat to work on and then a sharp steak knife. Be VERY careful, the plastic is thin and cuts easily on the side. Make a slit and be sure to cut away from yourself. 


Next I took some sharp scissors and cut out the back of the skull, the crown is a little harder to get through 


To attach the skulls to the foam I used wire. Using these tools I punctured a hole on each side of the skull that I could put the wire through 


I laid the foam wall on the floor( I used two foam brick sheets since I have a large entry way) and started figuring out where to place everything, since I would need to secure the skulls before hanging the wall. 

TIP: if you don’t want to make a stone wall, you could use a piece of black foam board from hobby lobby to create a similar look. 


To secure the skulls I used a thin screwdriver to punch holes In the foam on either side of  the skull where the wire would need to go through. After pulling the wire through the holes I would twist the wire Together to tack the skull. After all the skulls were tacked You can then stand the foam up ( better access) and tighten all the wires. I then would trim the excess wire and cover with duct tape so walls don’t get scratched up. 


To hang the stone wall I used nail and screws,( we are repainting after this)  but you can use the 3m Velcro strips as well to avoid too much wall damage.  If you want to use the creepy hands you will want to screw those in the wall. 


Once hung I started adding all the different things

I got these creepy hands from Taipan trading years ago, but found them at At Home this year. You can order them from here but they do sell out. I would get the grabbing hands to hang things like a lantern and the clawing ( pictured) for a sinister look. 


You can go to any craft store for greenery or use branches from your own tree ( willow tree branches would look fabulous!) 
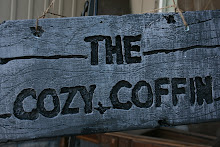
The beware sign is by my friend Heidi @helloheidishop it’s larger in size then what she sells since it was one of the first she made. She sells a lot of awesome signs! 

The lanterns are on timers, and not heavy I got them from a local store, Taipan Imports. Try to find something light with a timer. 

The sconces I found at Walmart 

I added cheesecloth to the creepy hands to add a little extra creepiness. 

You could use 3m hooks as well to help things hang just the right way. 

That’s it!  I love that it is what guests will see when I open my door. 

Happy Haunting! 


Sunday, September 13, 2020

Dungeon wall part 1


I love volunteering for Make A Wish! Last year one of my kids wished to have a Jack and Sally ( nightmare before Christmas) playhouse. My partner and I wanted to replicate the fireplace in Jack Skellingtons home, but we had to keep it in budget. After some research we discovered we could get some inexpensive large sheet foam (4x8) from Home Depot and use a dremmell to create the brick. This is how it turned out 


So fun right?! For Halloween I wanted to create a dungeon/ bat cave in my entry way and decided to use the same process to create the faux brick walls. Heres is what you will need: 


1 4x8 sheet of foam 

Dremmel with guide and 1/8 inch drill bit

2 saw horses or something to brace foam 

Marker

Ruler

Black paint

Gray paint 

Vacuum


It creates a pretty big mess so I would recommend doing it in the garage or on the front lawn. 

place the foam on the saw horses, white side up then draw lines ( horizontal/ vertical) six inches apart


I use my dremmel to carve out the lines ( make sure to wear eye protection) for the bricks, here’s my dremmel set up 


Follow the lines Across and then down to create the bricks


Create notches to round out the bricks 


Then vacuum foam 


This is how it looks horizontally but remember you can do vertical too. 

Next I take a quart of  black paint and paint the whole thing black, make sure to get into all the nooks  and crannies 


Next I use a dry brush technique to highlight the bricks. 
I use a quart of gray paint, lightly dip the paint brush and then do a few brush strokes in a paper towel to get some excess off, then lightly brush with wide strokes across the bricks in different directions. I didn’t get pics of this part but here is what it looks like 


That’s it! 
In part 2 I will show you how to add fun items to create The full dungeon wall


Tuesday, September 8, 2020

Halloween coffee filter wreath


 I see these Coffee filter wreaths everywhere but in white. For Halloween I thought it would be a great change to have one in black. But how would be the best way to get the deep dark black I was looking for? Pre-dyeing all the filters with craft paint was one suggestion I came across, but the time for them to dry and the mess just wasn’t something I was up for. So I decided to experiment and see if making them first with just the coffee filter and then spraying it with black spray paint would work. It did! It’s an easy,  inexpensive craft that just takes about 3-4 hours to make. That’s two Halloween movies! Here’s what you will need:

Dollar store foam wreath 

1 pkg coffee filters ( dollar store)

Glue gun

Glue sticks

Chopstick ( or something to hold coffee filter onto foam)

Scissors

Black spray paint 

Black, orange, white ribbon 


Get comfortable! I just sat in my comfy chair and had a side table with a place to put my glue gun and hold the coffee filters and glue sticks. 

Take 1 coffee filter and twist it onto the chopstick 


Squeeze some hot glue on end 


Then place on foam wreath, if it doesn’t stay, try putting a a little in the foam wreath where you are placing it. 


Make sure to hold it there for a minute, until glue is mostly cooled

Get your next filter and repeat the steps, place filter next to first one 


Keep adding filters around the front and side of wreath, don’t do the back 


After it all filled in, you will notice some unevenness, just give it a haircut 


Next you will spray it black. I just put mine on my grass. You will be using quite a bit to get in all the nooks and cranny’s Make sure you don’t overspray, just keep going back and forth and look at it at all angles. Don’t worry about getting it to deep, just what you can see. 


I then grabbed some ribbon and attached it. I love the old time feel of it! 


I put it with some old lace curtains and some black drapery material, perfect for my haunted mansion! 


Happy Crafting!